Saturday, 31 May 2014

The other violin prints

These are the prints I did using collageaph printing.
These two prints (above) I didn't re ink on the second time it was done with leftover ink.
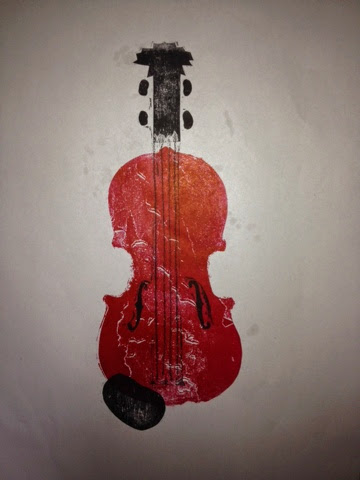
I looked back at my sound page and found that people said that the sound produced was brown so I printed with brown although I feel it looks red. Brown is also the colour a violin is normally.
These are the first two testers that I did the black print was originally all connected but the rest broke off so the rest ended up on the other side.

Friday, 30 May 2014

few more films

The film below is my second attempt at over laying films. this went a lot better than the first one because at times i could see different peoples faces but only for a few moments and it all looks very faded.
This is a little bit experimental, i took a line from each person and cut it together i don't feel it worked to well though because the lines are very quick so it moves from one person to the next quickly so i don't really like it.

Tuesday, 20 May 2014

Do a- Do- female- a de-Do

I have been wanting to use sound in my project for quite some time now but never really knew how to utilise it. it also moved drastically away from what i'd call a visual communication piece and more to a fine art piece. After the prints of the instruments i made i looked at the book 'Soundings a Contemporary Score' which was about a gallery full of multiple artists (with different variations of the word artist). While i couldn't really find anything of ultimate interest but the concept of sound art is interesting. so i decided to move from instruments to the human instruments i.e vocals. i booked the studio and planned to film, draw and record people while they sang. i wasn't entirely sure of how this would go. it sounds like an out of tune, out of time choir this is partly because some didn't actually know the song which was Do, Re, Mi. 

The film was more successful i think but it could of been better because as i layered the films on top of each other by the fifth film i lost the first and by the end i had about only 3 being visible so i am going to redo this and try to alter the opacity, i feel it will be a combination of maths and trial and error in order to get it right.

Friday, 16 May 2014

Violin in a blue explosion

Using the bugle blasts as a base, after photocopying them I did what I did with the ukelele strumming; I printed a violin onto it in black to see how it looks.
I was surprised at how much the blast over powered even black so when i used red I almost lost it amongst the ink.
I tried bypass printing them this one was the wrong way round.This was the right way round but it just got over powered by the blue explosion 


Friday, 9 May 2014

Bugle type 2

These are the second attempts at bugle art. I used less ink but there wasn't enough I think this time because I think it just fell out it made nice marks though.
This attempt was done on a wall I don't dislike it but it doesn't leave enough of an impact for me. Maybe if I add lots of ink like the first one...

Explosion

The Action: Similar to the ink on strings I filled a bugle with ink and blew. I didn't know how much ink to put in so using newsprint paper on the class floor I held the bugle over the paper and blew. It went every where it was certainly spectacular but it went every where.
The aftermath: I had a friend help peel away the paper and it left an interesting mark where it had been and an outline of the paper. I think it almost looks better than the result.
The Result: it is mostly blue but has a few splatter off shoots around the edge but most went on the floor. The ink spread across underneath leaving sort of wave like patterns.


Thursday, 8 May 2014

Double bass - scale up

Using a double bass I did large a2 prints. Unlike the violin which had a cover on it (I think it was laqure if that's how it's spelt) the basses was worn away leaving a much rougher texture making it hard to get ink off and causing the print to have a mottled look.

Other violin print works

Using the back of the violin I printed red onto the black front so the red shows through the gaps and f's.
I tried continuously printing the violin but it took ink very quickly so the next two prints were weak.
I did multiple coloured prints of the violin then using the ukelele strings printed strings onto the violins.
Same as the previous works just on the vibration background.

Printing in colour and bypass

These prints make use of bypass printing. Using an image from the human and instrument I by passed it onto a print which I did on the vibration ink splatters.The lower one is a mistake the bypass is upside down.
No bypass here but just trying a few colours.

Printing instruments

As well as looking at sound waves and vibrations I also tried printing with instruments. This proved to be difficult but effective. I started with just my ukelele and the only part which is interesting is the strings the back doesn't leave much and it's not quite as, elegant as a violins. The college has multiple broken instruments mostly orchestral string instruments like violins even a large double bass and because they don't have strings I can easily print the body's and the f's look brilliant to me. I was reluctant to put so much ink onto something that isn't mine but it comes easily enough. The strings here are the ukelele strings I was trying to make a violin again.

Tuesday, 6 May 2014

Vibrations and Sound waves

This is from last week where I looked at sound and vibration, moving in a different direction than the merging of humans and instruments. Using the ukulele strings I coated them in ink and while posting a sheet of paper through plucked the strings. It makes me think of shock or sound waves with how it looks jagged and zig zagged.